|
You may have seen the white and blue Clean Marina signs around your marina lately and wondered what they mean. Clean Marina is an organization made up of several other environmentally friendly organizations that create rules and enforce policies in regards to helping a marina abide by local environmental laws.
As it states on their web site: Clean Marina Washington was created in 2005 as an expansion of the EnviroStars program, which provides incentives for businesses to reduce and better manage their hazardous waste. Clean Marina Washington is an incentive-based certification program in which marinas assess their operations and implement improvements to better protect the environment. When they reach the qualification standards of Clean Marina Washington they earn the right to "fly the flag." Their four main goals are to:
Now that you know the “boilerplate” reason for their existence, what does this mean for you as a boat owner who moors their boat at a Clean Marina and wants to work on their boat in its slip, wash and clean it or hire a detailing company to wash and clean their boat? It means there are many cleaning products you can no longer use and it changes the way you maintain your boat. I read through their 112-page Resource Manual For Pollution Prevention In Marinas so you don’t have to. (Your welcome. Don’t worry, I was having trouble sleeping anyway. This helped immensely.) In this manual, they outline very specific rules and regulations that marinas that belong to the Clean Marina organization must follow. There are fines involved if they are caught being non-compliant, so most marinas are starting to take these rules more seriously. As the owner of a boat detailing company, my crew is often having to deal with a marina manager looking in their dock cart or bucket to make sure the cleaning products we’re using are allowed or approved by the Clean Marina association. As we’re finding out, not many cleaning products meet their strict requirements. The word “biodegradable” means nothing to this organization. All cleaning products must also be free of phosphates, chlorinated compounds, petroleum distillates, phenols and formaldehyde. What this means for you, the boat owner, is that if your boat is fairly dirty because it hasn’t been washed in a while or it isn’t washed on a regular basis (literally every couple of weeks) and you moor it at a Clean Marina location, you may only be able to wash your boat with water and vinegar, but not boat soap or any other type of cleaner that removes specific stains that commonly show up on boats, such as water streaks, green mildew, black mold or bird droppings. This can be extremely frustrating for the boat detailer who is trying to meet certain expectations of the customer and can’t get a boat as clean when only being allowed to use hose water as they normally could when allowed to use soap and other specific cleaners. In fact, this is becoming a more common issue with our customers who moor their boats at Clean Marina locations where many have chosen to move their boat, permanently or on the day we come to wash it, to a different marina that doesn’t belong to this organization so we can do a thorough cleaning with products that will actually work well to remove dirt and stains. We have always tried to use biodegradable products and more natural products to clean boats with in the first place, but even most of those aren’t approved by the Clean Marina organization. In fact, as we have learned, very few products are approved. So what boat cleaning products are allowed by the Clean Marina organization, you ask? So far, only two boat soaps we found and a few products you’ll find in the baking aisle of your local grocery store meet their requirements. Boat Soap In order for a boat soap product to be compliant, it must be biodegradable, phosphate-free AND not leave any suds in the water. After testing several “natural” boat soaps, we found only one product that meets all three of these requirements and one that meets two of them even though that particular boat soap had a Clean Marina “approved by” label on it.
Cleaning Products The boat cleaning products Clean Marina recommends for cleaning different stains and marks off your boat is vinegar, baking soda and lots of “elbow grease”. Yes, they even state in their manual that good old fashioned elbow grease is what it will take to clean your boat the natural way. Not everyone has elbow grease to clean their own boat with, especially the older boat owner. And as for a boat detailing crew who works on 40 plus boats each week, the grease in our elbows would be gone after just the first few boats if we could only rely on water and baking ingredients to clean dirty boats with. This is where a boat owner’s maintenance plan must be changed. If you can no longer use boat soap or cleaning products to remove dirt, mildew and stains, that means you’ll need to clean your boat almost weekly and constantly keep it waxed so that any stain or mark comes off more easily and has less of a chance to set in or soak into the gel coat. That might sound great to a boat detailer because it means more business, but I think it’s an unrealistic maintenance plan for a boat owner to maintain as often as it would be needed. I believe in the vision of this organization and as someone who tries to live as environmentally friendly in both my personal and work life as I can, I think there needs to be a healthy balance in this area. Companies that make body and skin care or household cleaning products are starting to realize that consumers don’t want harsh chemicals in their shampoo, deodorant or counter top spray and are having to come up with more natural ingredients that can still do the tough job they need to. I am hoping this will be the next step for companies that make boat cleaning products as more people choose natural ingredients and more organizations start to police what is going into our waterways. At the same time, this organization needs to realize that the mild boat soap people use to wash their boat with is nothing in comparison to the oil spills I often see floating on the water or the degradation of old boats left to die in their slip that have a constant white film floating around them. These issues also need to be addressed, as well as many others, to keep our waterways clean and healthy. And I’m sure that if enough people were using vinegar to wash their boat with, eventually the pH of the water would change and that would eventually cause environmental problems as well. For now, we’ll continue testing natural boat cleaning products that are currently on the market or new on the shelves and report back so you can start to replace caustic or chemical-laden cleaners with more natural ones that actually work well. Go to CleanMarinaWashington.org for more information and to see a list of all certified marinas.
0 Comments
Q: Can I use Armorall on my vinyl seats?
A: Technically, yes, but there is a better product out there. Try 303 Aerospace Protectant. It sounds like something you might use to keep your rocketship shiny, but it’s actually intended for boats. It offers the same kind of UV protection as a product like Armorall, but it packs a bit more of a punch because I find that it lasts longer. It can be used on vinyl seats, the rubber pontoons of your tender, plastics and plastic windows, leather and the “dashboard” area of your helm station. My truck has a black Tonneau cover, which I spray with 303 once a year, and it is still a nice deep black with no fading. On the bottle of 303 Aerospace Protectant, it says it can also be used on colored gel coat fiberglass. It may help protect your gel coat from harmful UV rays, but wax serves the same purpose and is a better choice than the 303, which is streaky and won’t cut through oxidation. Let’s say your boat hull is blue and has faded badly. If you spray the 303 on it, for about 30 seconds, it will look deep blue and brand new again, but as soon as the product dries, it will start to fade again. In this case, it’s best to use compound to remove the oxidation and then apply wax to protect from UV rays. Q: What’s the best way to prevent mildew from forming inside the cabin and the cockpit?
A: If you’re trying to prevent mildew from forming in your boat during the wetter months, you want to make sure there is enough air flow in your boat and no humidity. You can do this inside your boat with a dehumidifier and a fan or air conditioner. It’s not that you’re trying to keep your boat warm, but rather you’re trying to move air around, which is where the fan or air conditioner comes into play. In fact, mildew loves warmth, so don’t let your boat get too warm, especially if there’s no air movement. For the enclosed cockpit or fly bridge area, it’s best to make sure there is some natural air flow coming in under or through the canvas. Most people with ski boats put the canvas cover on so tight that there’s no movement of air and when they remove the canvas cover in the spring, a layer of mildew has formed on every surface. You should also purchase some moisture absorbers such as Star Brite’s No Damp Dehumidifier. These are great for an area with no plug outlets or inside the enclosure because they’re inexpensive and can be placed in several areas to absorb moisture. Q: How do I clean the green mildew that has formed around the edges of my deck carpeting in the cockpit?
A: If you see green mildew forming around the edges of the deck carpet in your cockpit, simply spray with a mildew spray, work in with a light bristle brush and pat dry with a rag. You may want to pull the carpet up during the wet months and put back again in the spring. You can find mildew cleaner spray at either your local boat supply store or in the cleaning aisle of your grocery or home improvement store. I recently wrote about the Clean Marina organization that is starting to control what member marinas can and can’t use in and around their properties. The goal of this organization is to help marinas and boat yards reduce and manage their hazardous waste and implement improvements to restore our waterways and protect the environment.
One of the rules we need to start following at marinas that belong to this organization is that we can only use approved boat soaps. This means that no matter who is washing your boat, whether it’s you or your boat detailer, only certain boat soaps can be used. Biodegradable means nothing anymore. They must also be phosphate-free AND leave no suds in the water. I mentioned some boat soaps in my article about the Clean Marina organization last month. In this article, I’ll go into more detail about three soaps you can use if your marina belongs to this organization. Green Doesn’t Necessarily = Clean What we’ve found with the “green” soaps that have less chemicals in them and are phosphate-free is that although they are more environmentally safe to use around waterways and don’t irritate the skin or nose as much as other stronger cleaners might, they sometimes aren’t strong enough for the extra dirty boats. Ideally, a boat should never be left uncared for that it gets so dirty that it requires strong chemical-laden cleaners or soaps in the first place, but unfortunately that happens all too often. The more often a boat is washed, the cleaner it will be and therefore the mild soaps and cleaning products will work just fine and because your boat is cleaned often allowing you to use milder cleaning products, those mild cleaning products will strip less wax so your boat is protected better and longer not allowing water streaks and bird droppings to set into the gel coat but instead wash right off. I agree, it’s a vicious cycle! Let’s recap… Boat is cleaned often > able to use milder cleaning products > strips less wax > boat stays cleaner. Likewise… Boat is not cleaned often > must use stronger cleaners to clean away dirt and mildew > strips wax in the process > boat gets dirtier faster because it doesn’t have a layer of wax protecting it > stains soak into gel coat easier. Now let’s review some of those more environmentally-friendly boat soaps that will help you keep your boat clean if done on a regular basis. I recommend washing your boat at least every three weeks, buffing and waxing the whole boat once per year and buffing and waxing the topside again about six months later if it’s starting to fade a bit. Starbrite Sea Safe Boat Soap This is one of the more common (easier to find) boat soaps we’ve been using that is both phosphate-free and doesn’t leave suds in the water. It will suds up a bit in the bucket but it rinses off almost suds-free. I’ve found it to do a good job at helping wash away dirt and it seems to get the boat nice and clean. Captain John’s Yacht Shine This was the only boat soap we could find at this time that actually had an “approved by Clean Marina” sticker on it. However, this soap did leave suds in the water, so I’m not sure if they actually tested it or if we just got a stronger mixture this time. It did an alright job of getting the boat clean, but we had to use a bit of extra elbow grease to get some tougher stains out. It’s a soap we often use at the more strict marinas so we can show the harbor master the seal of approval if asked about our supplies, but it’s not typically our first choice for washing. Zaal Sea Solve This is a boat soap that was introduced to me a few weeks ago and we’ve been using it ever since. It’s was first designed as a boat soap that was very good at removing salt spray and crystals but it became so much more. It’s phosphate-free and is made of mostly natural ingredients and smells great. Your boat will literally smell like fresh fruit. It’s really good at cleaning tough stains and works well to get dirt out of teak decks. It has a de-foamer in it, so you won’t see suds in the bucket or the water. At first, you feel like you’re just using a bucket of water to wash your boat with since you can’t see any suds, but after a while you get used to it and realize that it’s doing a good job cleaning. However, this soap is almost three times as expensive as the other soaps. We save it for our large yachts and boats with special finishes. Tips On Green Cleaning You can try to wash your boat with baking ingredients, such as vinegar and baking soda, but let’s face it, in some cases when there’s more dirt than you bargained for, those ingredients are better for zucchini bread than boat washing. Unless you wash your boat on a weekly basis, completely pure ingredients may not be able to cut through strong stains, heavier dirt or green and black mildew as quickly or as easily as something with a specific cleaning agent in it that is meant for the job. I’ve always said that cleaner wax is one of the best cleaners you can use because it stays on your boat. You can use cleaner wax to remove scuff marks made by the shore power cord, fenders or lines. Cleaner wax can also brighten up stainless, remove marks in non-skid, remove stains left from bird and spider droppings and leaves, clean and polish plastic windows and remove stubborn water streaks in between your big wax jobs. One thing I’d like to point out is that some of the spray cleaners that are meant to remove specific stains or that are considered “green” such as Simple Green can remove wax over time. You’re main goal is not to use a cleaning product that removes wax. That’s not doing your gel coat any good. Better to use cleaner wax as a cleaning product before you reach for the spray cleaners. Q: How often should my boat get washed?
A: As the owner of a boat detailing company, I would like to say that you should have us wash it every three days! That may help me pay for my next trip to Europe, but it doesn’t help answer this reader’s question and it’s completely unrealistic. The truth is that it’s different for every boat and it depends on several factors – where it’s moored (covered or open slip), how often it’s used, where it’s used (salt or lake water) and when it was last waxed. If those are the factors, then X = a boat that doesn’t require strong cleaners or soaps to get clean. X does not equal “a clean boat” because you can get a clean boat by washing it with acetone or bleach (not that anyone ever would – just making a point), but you don’t ever want your boat to get so dirty that it can’t easily be cleaned with mild cleaners. That’s why X = “a boat that doesn’t require strong cleaners or soaps to get clean”. I make this point because a lot of marinas these days are changing their policies and not allowing certain types of cleaning products or boat soaps to be used at their marina anymore. As boat detailers, we run into this all the time and have had to change the products we use to comply with these new rules. So if this is the way things are heading, then best to make the change now by making sure your boat never gets so dirty that it needs cleaners your marina won’t approve to remove stains or mildew. I’ll get off my phosphate-free soap box now and finally answer the question. You’d think that if your boat is in a covered slip, you don’t need to wash it as often because it’s not getting rained on. With a covered slip, you’re basically swapping water streaks for spider droppings and you definitely want to wash those off your boat quickly as they can stain permanently if left on the gel coat long enough and especially if your boat hasn’t been waxed in a while. If you have spider droppings and don’t have time to wash your boat, at least go around with cleaner wax and wipe them off. If your boat is in a covered slip and you’re quick to remove spider droppings, you can get away with washing your boat every eight weeks or so before it becomes a bigger job than just a basic wash. If your boat lives outside (not in a covered slip), you can get away with washing it every three to four weeks as long as it has a good coat of wax on it so the water streaks and bird droppings don’t start to set in. However, each time you take your boat out in salt water, wash it as soon as you get back to the dock to remove all salt spray. A quick hose down isn’t good enough because that salt spray can be quite sticky and it will eventually etch your windows with water spots that never come off. If you only have time for a quick hose down after a salty trip, at least spend a few extra minutes washing the windows and wiping them dry. This will pay off greatly in the future. 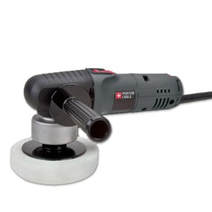 Q: I have a DA (dual action) polisher that I use on my car. Can I also use it on my boat?
A: Yes! There are areas where a DA polisher can come in quite handy if you don’t want to spend a lot of money on a variable speed buffer and if you just want to keep certain areas of your boat polished yourself in between the big yearly wax jobs. As I just talked about in the previous question, a DA polisher can be used to keep colored stripes buffed and polished on a regular basis to keep them from fading. DA polishers, because of their smaller size, are also great for getting in those hard to reach places such as around corners, under rails or between areas of non-skid. One area where we often use a DA polisher is on gel coated cap or toe rails. These areas often fade quickly because of their horizontal surface that bakes in the sun (UV rays hit them more directly causing them to fade faster). A DA polisher is also great for buffing the topside of a ski boat or sailboat that has a lot of nooks and crannies. A DA polisher isn’t as “aggressive” as a variable speed polisher when it comes to removing heavier oxidation, so I wouldn’t recommend using one on your whole boat, such as the hull, brow or transom. They’re best used for smaller areas that you can do more often to remove light oxidation and add a layer of wax throughout the season as needed. We love the Porter Cable dual action polisher. There are many cheap brands online but Porter Cable has a much better polisher with improved features and a motor that will last a long time. |
The best way to contact us is through our estimate request form if you're a new customer or via email if you're a current customer.
info@deckhanddetailing.com
206-354-9777
info@deckhanddetailing.com
206-354-9777
|
Deckhand Detailing, established in 1990, offers affordable and high quality boat cleaning and detailing services including boat washing, boat buffing and waxing, interior and exterior cleaning and more. We're experienced, friendly and easy to work with because we love what we do!
|
|

Copyrighted material. 2002 - 2024, Deckhand Detailing. All content on this site, which includes photos, videos, written content and our logo, is copyrighted material and may not be copied in any way or for any use without permission. The Deckhand Detailing name and logo are registered trademarks.